How to install Apache Server, MySQL,PHP,phpmyadmin on linux

We will learn how to install Apache 2 web server with php, MySQL and phpmyadmin on Linux.For this Post i am will be using Ubuntu 12.4 but you can use any linux ditro.

Lets Start.Open up the command terminal in Linux and type “sudo apt-get install update” this will update the repository in ubuntu,After this type this command to install Apache 2 web server”sudo apt-get install apache2″ in the installation it will say do you want to Continue, type “y” to install it.

Ubuntu-2012-12-01-23-31-13

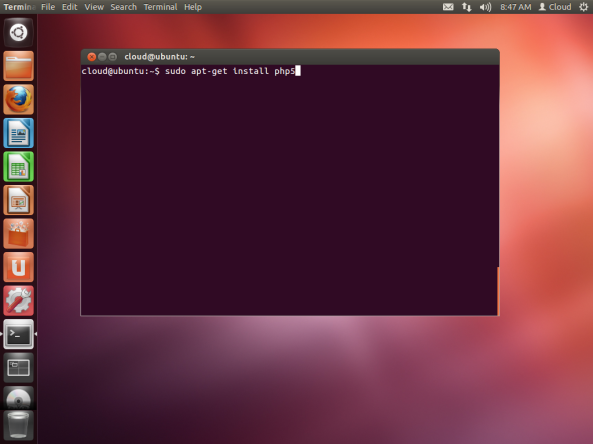
Next we need to install php5 programming language in ubuntu Linux, Type “sudo apt-get install php5” in the Terminal and press enter to install it.

Ubuntu-2012-12-01-23-37-38

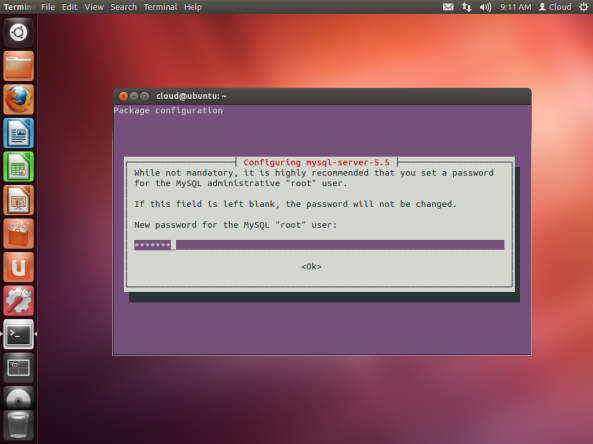
After this we will Type this command “sudo apt-get install libapache2-mod-php5” to connect with apache 2 web Server.After this we need to install MySQL database, Type this command in the terminal “sudo apt-get install mysql-server” to install  MySQL database in ubuntu Linux, after the installation mysql server will ask you for the root  password, Type the desire password e.g ubuntusql and press enter after this it will again ask you to retype you password enter the same password and press enter.

Ubuntu-2012-12-02-00-01-34

After setting up the MySQL server on Ubuntu Linux its time to install phpmyadmin, Type “sudo apt-get install libapache2.mod-auth-mysql php5-mysql phpmyadmin”  and press enter, after installation process is over  Configuring phpmyadmin window will show up choose apache2 webserver and press enter.

Ubuntu-2012-12-02-00-10-59

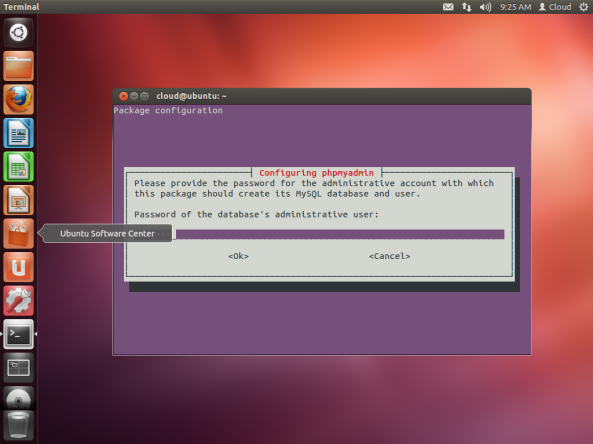
After some Configuration process this window wills show up type your Mysql Database password e.g. “ubuntusql” and press enter.

Ubuntu-2012-12-02-00-15-42

After this another window will show up in that window type your desire phpmyadmin password e.g “ubuntuphp” and press enter, Type the same password again and press enter.

Ubuntu-2012-12-02-00-21-29

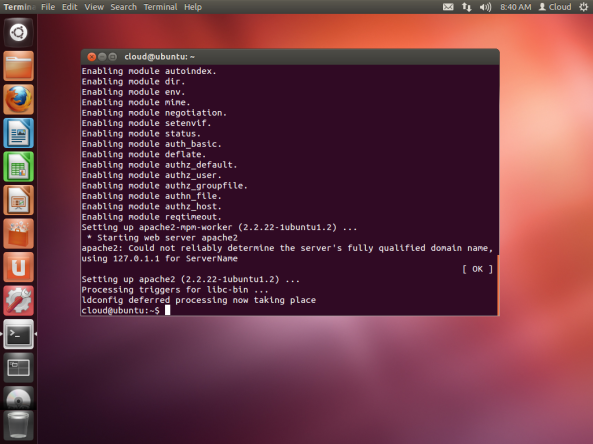
Now your good to go everything has install in the system properly now we need to create a link in the /var/www  directory for easy access  to that type this “sudo ln -s /usr/share/phpmyadmin /var/www/phpmyadmin” in the Terminal and press enter.Now type this command “sudo /etc/init.d/apache2 restart” to restart apache.You can also start or stop apache2 by replacing restart with start or stop.

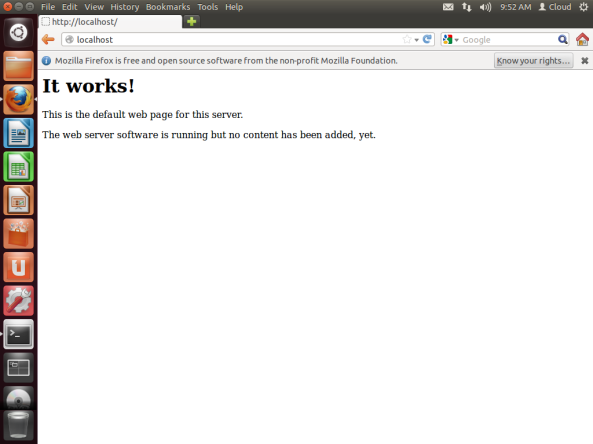
After that open Firefox or any web browser and type localhost, if you see the following screen that means apache2 server is working properly.

Ubuntu-2012-12-02-00-42-45

To add web content on this server open up the var/www/ directory and create a html or php web file.

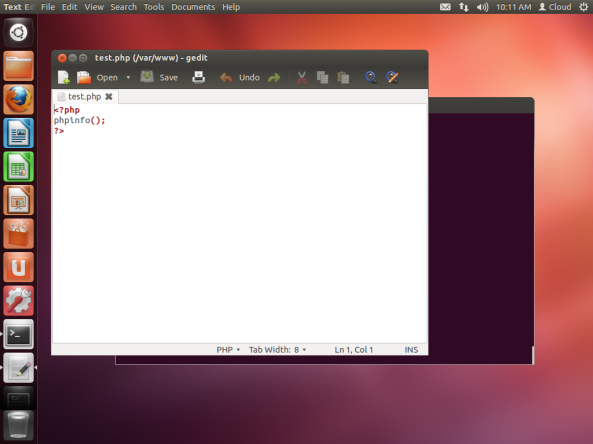
To test php locate the www directory by typing this command in the terminal “cd /var/www” after this type this “sudo touch test.php” to create a new php after that type this “sudo gedit test.php” and press enter, a code editor will open up; type this line of code ““in the test.php file to check if  php is working.

Ubuntu-2012-12-02-01-02-24

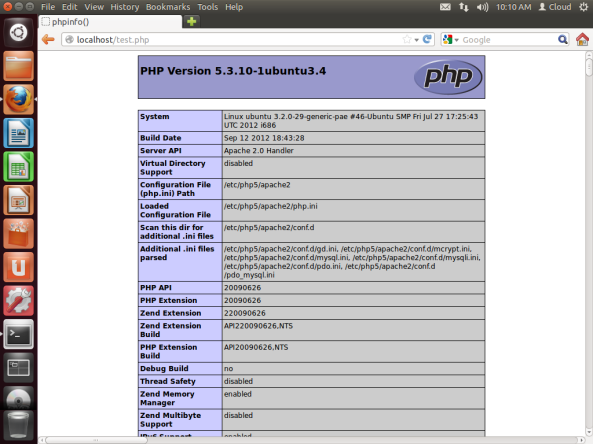
Open up the web browse and type localhost/test.php in the url, if you see the following page that means php has properly installed on the system.

Ubuntu-2012-12-02-01-00-59

Now Type localhost/phpmyadmin in the url to open phpmyadmin.

Ubuntu-2012-12-02-00-47-07

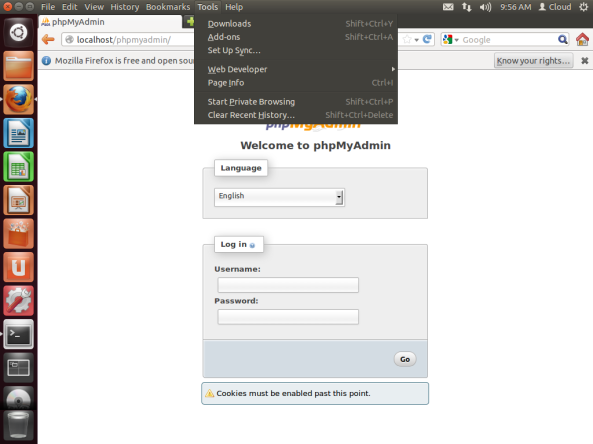
Enter your Username and password,User name is “root” and the password is ubuntuphp yours will be different and click on go or just press enter. After logging in you will see the following screen.

Ubuntu-2012-12-02-01-09-56

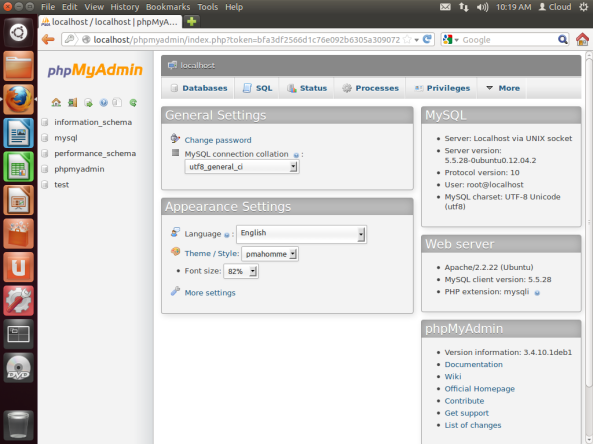
Now everything is working fine to learn more about myself or php check my other posts.

Artifical Feelings and Emotions | Artificial Intelligence.

Artificial Feelings and Emotions  are consider as impossible but now it is possible to develop a Computer program that can process these kinds of data and using that program to create a realistic humanoid Robot that can have  feeling and emotions just like a homosapiens (Human), I have created an Algorithm that will show you the process required to create Artificial Feelings and Emotions. Note if you want to make this program you need to Know Programming, any programming language will work fine but i recommend using C, C++, C#, Java, C#, VB.net, python etc.

Let’s begin the process to create Artificial Feelings and Emotions (AIFE) step by step.

Creating Artificial Feelings

First thing the user does is Some Action which  will start up the program for example a user touches some part of the body, when user touches the body the program needs to know which part have been touched and how much force is exerted on that part and what is the temperature on that part .According to my observation human mode changes or different parts of the brains(Amygdala, Temporal lobe, occipital lobe, Cerebellum, Entorhinal Cortex etc.) are activated when some of their body parts is touched. Human Response differently when different word are spoken together or some sounds is generated for example when human hears music different parts of the brain activated and behave together and the human body begin to feel relax but it doesn’t means that they will always feel relax when music is played some human react opposite of it and there fiscal expression also changes.

In this process i will use my observation to create AIFE program, i will use the following algorithm in form of Diagram.

First user will give a command or perform an action that command will be process in AI Algorithm which is itself a program. AI Algorithm will look in Data file which is the brain of the program data file will contain all data for example “What is your name or age” Answer “Alexander VII age = 15” these data file can be xml files or an sql Database files it depends on you which language and what format you want to access or store data in these files. The user Command is searched in data file after getting the required info the info is then passed to the Translator which will convert the sentence in to different language even thou translator is not required but you can use it any way if you are making a very powerful program like i did, after this the translator will give the results which can be or understand by the user. To Activate the feeling process we will need an sensor connected to arduino or any hardware component which is capable of determining force when user touches the sensor or you can use any touch device for testing purposes but for this example i have used an arduino and piezoelectric sensors.

The Method is connecting the sensor in X,Y array position even thou there are some scientist who are making Robot skin sensor but these sensor are created in the same way. Connect the Sensors in Matrix and then connect it to the arduino also connect the arduino to the computer. we will be using arduino to determine which sensor is activated in which position and how much force is exerted on that particular sensor for example when a user touches a sensor in this case the user have touched the sensor x[4],Y[3] when the sensor is touched it produces a small current or signal which can be understand by the arduino. we will write a program for arduino in C++ or arduino language to use these signals to generate feelings, we also need to Connect the Arduino program to Ai Program so we can use these signal in our program to determine actions in Datafiles for example a user have touced a sensor in X[4], Y[3] position the sensor send the signal to the arduino microcontroller which is linked to the arduino debugger ,The program which have written for arduino to use sensors will send the results in this case it is X[4], Y[3] to AI program. Ai program will use the results and search for the information that have written for that particular results like “don’t touch me here or it hurts“. Example

if(X[4],Y3 = touch); {search.position X[4],Y[3] in datafile;} else {do nothing;}

Well i recommend combing the two values because it will produce some errors if you are making a real robot skin that can response to touch. Example

Combining X[4],Y[3] = 43

if(pos.int(43) = touch); {search.position[43]  in datafile;} else {do nothing;}

you can also  can use arrays, variables and switches. You can use the same process for the touch device like touch screen monitor.

When the Program has detected the position it will search an Answer or movement for that particular position with some tolerance but in this case there is no tolerance because i am using only 10 sensors and You can also measure how much force is exerted on the sensors and also the temperature with the same method as the position.

if(pos.int(43) = 5N); {search.Position[43+5N] in datafile} else {do nothing;}

you need to do a lot of programming to make it behave like a human does.

Emostion

To give emotion to your program you will be using the same method but you will be using feeling + Special Words to Control the behavior of the program for example i said a joke to a program the program will look special words or special sentences with respect to voice tone (which is another process to increase accuracy but you can leave it) in the Datafile and look for approximate movement in this case it is to laugh or smile, when the user told the a  joke the program will start to laugh but you can also use tiny motors to control facial expression of the robot you can also use fiscal expression algorithm or object recognition algorithm to connect to feeling or emotion for example when your sad or happy your fiscal expression changes the program will recognize the expression and tell you “cheer up” or something else.

this is it if you have some troubles write it in the comments and it will be dumb for robots to have feeling and emotion because robots are perfect but you can make a real human with integrated machines and electronics with feeling ,emotion and much more.

i Will also be writing another blog on self-learning and self-awareness algorithms and programs.


How to Cracking Oracle 11g


Download Windows Binary: thc-orakelcrackert11g.tar.gz

OrakelCrackert 1.00 released 20070926
=====================================
OrakelCrackert is an Oracle 11g database password hash cracker using a 
weakness in the Oracle password storage strategy. With Oracle 11g, case 
sensitive SHA1 based hashing is introduced. Storing passwords in a case 
sensitive way introduces more possible password combinations so 
password cracking takes longer. For example, the number of possible 
password combinations using a password generated out of the character 
set "[a-z][A-Z][0-9]#$_" where passwords start with a alpha character 
using is 52/65 * 65 ^ passlength. For an 8 position password this means 
254.915.850.312.500 combinations.

Since Oracle is still storing the DES based password hashes, an attack 
much faster than brute forcing can be launched for most (not all) 
passwords. To do so:

1 - Get both the Oralce < 11g and 11g password hash, for example by 
executing the query "select user, password, spare4 from sys.user$ where 
username = ".

2 - Crack the old DES based password hash (field "password") which is 
generated using the upper case version of the mixed case password 
(note: this is not applicable to all possible passwords in Oracle 11g).

3 - If the upper case password is found, calculate the SHA1 result of 
the ASCII value of the password followed by the salt (nibble 41-60 of 
field SPARE4) to the SHA1 based password hash (nibble 1-40 of field 
SPARE4). Do this for every upper/lower case combination possible until 
you have got a match.

4 - Voila!

Using a password generated out of the character set 
"[a-z][A-Z][0-9]#$_" where passwords start with a alpha character 
(currently supported by OrakelCrackert), the number of password 
combinations shrinks to 26/39 * 39 ^ length (= step 2) + 2 ^ length (= 
step 3). A full brute force for an 8 position password will now at 
maximum 'just' take 3.568.006.173.910 tries. This is about 77 times 
less than the original value.

Example:
========
select name, password, spare4 from sys.user$ where name = 'THC';
THC,435D0D3C8468DBC4,S:D39F4CC16573323279E5E4E16D359D6C55DCC09202B03D5D74B6841CEA2E

USER_PASS = ASCII(USER + GUESSED_PASS)
PASS_UPPER = ORACLEHASH(GUESSES_PASS)
FOR(ALL UPPER/LOWER CASE COMBINATIONS)
	PASS_SALT = ASCII(PASS + SALT)
	GUESSED_CASE = SHA1(PASS_SALT)
	IF(GUESSED_CASE == SPARE4)
		DONE!

With real-life data:
USER_PASS = ASCII(THC + THC#) = 0x54484354484323
PASS_UPPER = ORACLEHASH(0x54484354484323) = 0x435D0D3C8468DBC4
FOR LOOP (only the correct guess):
	PASS_SALT = ASCI(tHC# + 0x02B03D5D74B6841CEA2E) = 
0x7448432302B03D5D74B6841CEA2E
	GUESSED_CASE = SHA1(0x7448432302B03D5D74B6841CEA2E) = 
0xD39F4CC16573323279E5E4E16D359D6C55DCC092
	IF(0xD39F4CC16573323279E5E4E16D359D6C55DCC092 == 
0xD39F4CC16573323279E5E4E16D359D6C55DCC092)
		WE'VE GOT HIM!'

How to use my MySQL Server”Basics”

MySQL is a database to store the user information MySQL is free and Opensource  it is very easy to use,SQl stand for “structure query language.”

What is Database ?

This is one of the hardest topic to define but i will enplane you as easy as possible lets go, imagine an excel sheet on your mind then divide them into rows and columns and give the row a name like a,b,c,d and give the columns 1,2,3,4 then i want you to store “apple” in a1 if you did it then when you need a apple you would go to a1. this is like an array where the data is stores in specific memory and then pointing that memory to access that data.if you understand this then you know what is a database, a database is used to store large amount of data then application or web pages  use that database to access that data,a user can store there picture,music in a database a user can also password protect the data in a database.

How to install Mysql ?

To install MySQL Server on a windows here is the process you can choose your platform.

  • Download MySQL by visiting here .
  • Download the MySQL windows installer.
  • after Downloading install it on the computer.
  • Locate the directory where MySQL is installed and open it up.

after the above process it would open a console window ,type in password if you have entered any  in the installation process.so lets get started to use MySQL first enter the “help” command basically it will print the list of MySQL commands. To see the Databases enter this command “show databases;”   remember to put semi-colon at the end of the command or statement because it means the command or statement has ended.after typing this command you will see some databases that are created to use these databases we will use the “use” command and the name of the database(e.g. use test).to see tables inside the database we will use the “show tables;” remember we are using the test database, To see which database are you using use the “status;” command to see the current status of the database.under the current database you can see your current database that you are using.this command also shows which database server are you using which TCP port are you using and many more things.to create a database we will use “create database” command and the name of the database (e.g.”create database hello;”) this will create a hello database to see your database type the “show databases” command,To delete a database we will use the “drop database” command and the name of the database(e.g.”drop database hello“)this will completely remove every thing of the database that you have chosen remember to use this command with caution.to use our database that we have created we will then again use the “use” command.Let’s create a Table if you don’t know what is a table you can think of this way think a folder is a database and the files inside that folder are tables,to create a table we will use the ‘create’ command,(e.g.”create table infor (name varchar(25), address varchar(100), age int, pnumber varchar(12));”)so it will create a fields named info and inside that it will create varchar(variable character) which is 25 character long and it will create another varchar which is 100 character long then  int(integer) age and then varchar which is 12 character long.to see your tables that you have created type the “show tables” command it will the show your tables.if you want to see the content of  the infor table use the “describe” command and the name of the table(e.g.”describe infor;”)to erase a table we will use the “drop” command and the name of the table(e.g.”drop table infor”).to insert something in to a table for example our name, address etc.. we will use the “insert into” command and the name of the table.(e.g.”insert into infor values (“sik”, ” fake address”, 14, “5555-555-103”); “) remember string would be in quotes.after that we will select every thing using the “select * from” command and the name of the table(e.g.”select * from infor“) it will basically select every thing from infor table that is inside the “hello” database.if you want to see only address not the name and any other fields the we will use “select”command name of the field and the table name (e.g.”select address from infor”)it will echo the address that is stored in infor.to delete something from the table we will use the “delete from” command and table name then we will type “where” and the name of the field which is equal to content in the field.(e.g.”delete from infro where address=” fake address”).then enter this command “select * from infor” to see if the fake address has deleted or not.

End of MySQL Basics.

How to boot and run linux from USB Flash drive.

To boot linux from usb flash drive you need a USB Flash Drive around 2GB and you need to download some of the following Software.

1==>Download Universal USB Installer from here.

2==>Download a linux distro in this case i am using Kubuntu .

after that run the Universal USB Installer then it will ask you to agree the License Agreement click “a Agree” to agree the license agreement after that setup your slections page will appear

Then select your linux Distro that you have Downloaded e.g. “kubuntu”

Browse the linux distro that you have downloaded e.g.”kubuntu-11.10-desktop-i386″

Then Slect USB Drive the e.g.”H”

Then click “Create” to extract the content of the iso into the USB Flash Drive.

This process will take 4 or 5 minutes after that it will say completed “click cancel to close the  window” then restart the computer “Rember to plug the USB Drive into the computer”

then a boot screen will show(if boot screen dosen’t show go to your bios and select boot option and change to usb first or  you can go to boot option and select the USB Drive to boot )

Select Run linux to run the linux Operating System.

Know you run linux operating system from your USB Flash Drive .

How to use linux Commands.

To use Linux commands you need to understand the Linux command terminal or Linux Shell as some say, to start using Linux commands open the Shell or the command terminal you would see a console window in that window you type the Linux commands to do your works some Linux commands are as fallows.


File Commands

  • ls – Directory listing
  • ls -al -Show listing with hidden files
  • cd dir – change directory to dir
  • cd- change to home
  • pwd – show current directory
  • mkdir file – create a directory with a name file
  • rm file – remove a file
  • rm -r file – delete a directory file
  • cp file1 file 2 – copy file1 to file2
  • touch file – create a file
  • cat > file – places stander input into file

System Commands

  • date – show the current date and time
  • cal -show the calender
  • uptime – show current up time
  •  w – display who is online
  • whoami – who you are logged in as
  • finger user – display information about user
  • uname -a – show kernel information
  • cat /proc/cpuinfo – shows cou information
  • cat /proc/meminfo – shows memory information
  • man command – shows manual of a command
  • free – show memory and swap usage

Net Work

  • ping host – ping host and output the results
  • whois domain – get the information for the domain
  • dig domin – get DNS information for the domain
  • wget -x host – reverse look up host
  • wget file – download a file
  • wget -c file – continue a stopped download

Installation

  • install from source file
  • ./configure  – software configurations
  • make
  • make install – install the software
  • dpkg -i pkg.deb – install a debian package
  • rmp -uvh pkg.rpm – install a package (Rpm)

Process management


  • ps – display currently active processes
  • top – display all  running processes
  • kill – kill process
  • killall – kill all process

Search Commands

  •  grep pattern files – search for patterns in files
  • locate file – find all instances of files